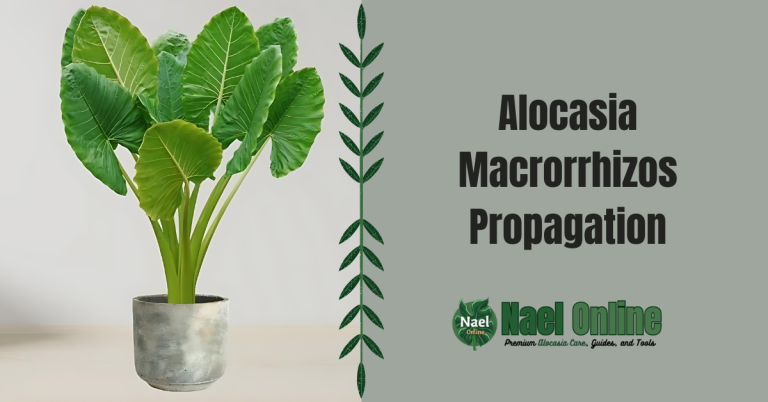
Alocasia Bulbs: Planting, Care, and Growing Tips

Hey there, plant lovers! Lucas William here, your friendly neighborhood Alocasia expert straight from the heart of New South Wales. After a decade of getting my hands dirty with these magnificent plants across Australia and the USA, I’m pumped to share my hard-earned wisdom on growing Alocasia bulbs. Trust me, once you’ve mastered this skill, you’ll be churning out gorgeous elephant ears like nobody’s business!
Before we dive in, let me let you in on a little secret – having the right tools can make or break your Alocasia growing game. At Lexivo, we’ve got everything you need to set yourself up for success. From perfectly sized pots to premium potting mix, you’ll find it all at https://lexivo.com.ng/shop/. Now, let’s get our hands dirty!
Demystifying Alocasia Bulbs: What Are They Really?
First things first – let’s clear up a common misconception. When we talk about Alocasia bulbs, we’re actually referring to their corms or rhizomes. These fleshy, underground storage organs are the powerhouses behind those stunning elephant ear leaves we all adore.
Types of Alocasia “Bulbs” You Might Encounter
- Corms: Round, flattened structures often found in varieties like Alocasia ‘Polly’
- Rhizomes: Thick, horizontal stems seen in species like Alocasia macrorrhiza
- Offsets: Baby plants that sprout from the mother plant’s base
Understanding what you’re working with is crucial for successful Alocasia bulb growth. Each type may require slightly different care, but don’t worry – I’ve got you covered!
Sourcing Your Alocasia Bulbs: Quality Matters!
Before you can start growing Alocasia bulbs, you need to get your hands on some healthy specimens. Here’s what to look for:
Buying Alocasia Bulbs: What to Look For
- Firm, plump bulbs without soft spots or mold
- Visible growth points or “eyes”
- No signs of damage or pest infestation
Pro tip: While it’s tempting to go for the biggest bulbs, medium-sized ones often establish more quickly.
Harvesting Bulbs from Existing Plants
If you’re lucky enough to have a mature Alocasia, you can harvest bulbs yourself:
- Gently remove the plant from its pot
- Look for offsets or small corms around the base
- Carefully separate these from the mother plant, ensuring each has some roots attached
Remember, timing is everything when it comes to Alocasia bulbs. How to grow them successfully often depends on starting with healthy, viable specimens.
Preparing for Planting: Setting the Stage for Success
Alright, you’ve got your Alocasia bulbs – now what? Let’s get everything ready for planting:
The Perfect Potting Mix for Alocasia Bulbs
Alocasias love rich, well-draining soil. Here’s my go-to mix:
- 1 part high-quality potting soil
- 1 part peat moss or coco coir
- 1 part perlite or pumice
This blend provides the perfect balance of moisture retention and drainage that Alocasia bulbs need to thrive.
Choosing the Right Container
When it comes to pots, drainage is key. Look for containers with:
- Ample drainage holes
- A size appropriate for your bulb (start small and pot up as needed)
- Material that suits your watering habits (terracotta for heavy waterers, plastic for those who tend to underwater)
Planting Your Alocasia Bulbs: The Moment of Truth

Now for the exciting part – actually planting those Alocasia bulbs! Here’s how to grow them step by step:
- Fill your chosen pot about 2/3 full with your prepared potting mix
- Place the bulb in the center, with any visible growth points facing up
- Cover with soil, leaving the top 1/3 of the bulb exposed
- Water thoroughly until water runs out the drainage holes
- Place in a warm, humid spot with bright, indirect light
Remember, patience is key when growing Alocasia bulbs. It can take several weeks for signs of growth to appear, so don’t lose heart if you don’t see immediate results.
Special Considerations for Different Bulb Types
- Corms: Plant with the flattened side down
- Rhizomes: Lay horizontally just below the soil surface
- Offsets: Treat like small plants, ensuring the roots are well-covered
Caring for Your Growing Alocasia Bulbs
You’ve planted your Alocasia bulbs – now how do you keep them happy and thriving? Let’s break it down:
Light: Finding the Sweet Spot
Alocasias love bright, indirect light. Too much direct sun can scorch those beautiful leaves, while too little will result in leggy, weak growth. An east-facing window is often perfect, or a few feet back from a south-facing window.
Water: The Goldilocks Approach
When it comes to watering Alocasia bulbs, consistency is key. Aim to keep the soil evenly moist but never waterlogged. Here’s my watering routine:
- Check the top inch of soil daily
- Water when the top inch feels dry
- Use room temperature water to avoid shocking the roots
- Water thoroughly until it runs out the drainage holes
Temperature and Humidity: Tropical Vibes Only
Remember, Alocasias are tropical plants. They thrive in warm, humid conditions:
- Temperature: Aim for 65-80°F (18-27°C)
- Humidity: 60% or higher is ideal
To boost humidity, try:
- Grouping plants together
- Using a pebble tray filled with water
- Running a small humidifier nearby
Troubleshooting: When Alocasia Bulb Growth Goes Awry
Even with the best care, sometimes things don’t go as planned. Here are some common issues and how to fix them:
No Signs of Growth
Patience is key, but if weeks have passed with no action:
- Check for rot (soft, mushy bulbs)
- Ensure temperature and humidity are appropriate
- Consider gently unearthing the bulb to check for root development
Yellowing Leaves
Often a sign of overwatering or poor drainage. Check your soil moisture and ensure your pot has adequate drainage holes.
Pest Problems
New growth is particularly vulnerable to pests like spider mites and mealybugs. Regularly inspect your plants and treat any issues promptly with insecticidal soap or neem oil.
From Bulb to Beauty: Nurturing Your Growing Alocasia
Congratulations! Your Alocasia bulbs are growing into stunning plants. Here’s how to keep them thriving:
Fertilizing for Fabulous Foliage
Once your Alocasia shows steady growth, start feeding it:
- Use a balanced, water-soluble fertilizer (10-10-10)
- Feed every 2-4 weeks during the growing season
- Dilute to half-strength to avoid fertilizer burn
Repotting: When and How
As your Alocasia grows, it may need a larger home:
- Repot when roots start peeking out of drainage holes
- Choose a pot 1-2 inches larger in diameter
- Always use fresh potting mix when repotting
Alocasia Bulb Care: Quick Reference Guide
Here’s a handy table to keep your Alocasia bulbs thriving:
| Care Aspect | Guidelines |
|---|---|
| Light | Bright, indirect light |
| Water | Keep soil evenly moist, not waterlogged |
| Soil | Well-draining, rich in organic matter |
| Temperature | 65-80°F (18-27°C) |
| Humidity | 60%+ |
| Fertilizer | Balanced, every 2-4 weeks during growing season |
| Repotting | When rootbound, usually annually |
Wrapping Up: Your Alocasia Bulb Growing Adventure
There you have it, folks – everything you need to know about how to grow Alocasia bulbs into stunning, show-stopping plants. Remember, every Alocasia is unique, so don’t be afraid to adjust your care based on what your plant is telling you. With a little patience and the right know-how, you’ll be well on your way to a lush, tropical paradise right in your own home.
Ready to start your Alocasia bulb growing journey? Don’t forget to check out our shop at https://lexivo.com.ng/shop/ for all the tools and supplies you’ll need. From premium potting mix to the perfect-sized pots, we’ve got everything to set you up for success.
Happy growing, and may your Alocasias thrive like never before!

